SYSTEM RESTORE
So what is system restore and why bother with it? Well, system restore is a quick fix of sorts that can be used to undo some software (program changes), fix some problems that may have been caused by a download, or fix a change to the configuration of your computer. Hardware related stuff can not be fixed with system restore. One of the great things about using system restore is all of your documents (files like pictures, music, and word documents) remain intact!! Remember you can click on the pictures to enlarge them if need be, and we are working on a Windows Vista machine in our example
1. Click on the start button

2. A box should open up that looks like this:
3. Click on Control Panel. In our example it is on the right hand side third one up from the bottom. A window will open up that should look this:
4. We are looking for System Maintenance. Right underneath it is Back up your computer. Click on that and another window will open up looking like this:
5. At the bottom it will say Use System Restore to fix problems and undo changes to Windows. Click on that. You should next see a window that looks like this:
As you can see there a two options here. You can use the last Restore Point or go to an older one. On my computer the system restore points are saved automatically when any software changes are made.
6. In this example, I am going to use a slightly older Restore Point so I have selected Choose a different restore point. Click Next > after you have made your choice. A new window will open like this:
Now, from this list I have several restore points to choose from. Generally, I try to choose a restore point that was closest in date to whatever software change, driver download, or update was made.
7. From this List I will choose the restore point Undo: System Restore. (In this example, I am undoing a System Restore.) The steps are the same no matter what you select from the list. Click Next > and you will see a window like this open:
8. Click Finish. System Restore will close and you will see window open like this:
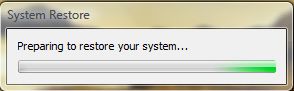
9. Click Yes. A new box will open resembling this:
This window may stay on the screen for awhile. Do not be freaked out. The computer is doing what it says: Preparing to restore your system. After a little while you will see another screen that pops up that says initializing. It will walk you through what is doing. Let it. Do not do anything to the computer. Then the computer will restart. This process may take some time again do not panic.
10. After the restart, a window will be on the screen that looks like this:
11. Click Close and you are done!!
A couple of thoughts on System Restore: If your desktop looked different on the date you chose, then it will revert to whatever it looked like on that date. So, don’t freak. All your pictures, music, Word Documents, and spreadsheets are still there. These restore points are only good if they done prior to any changes in programs, updates, software installs, and what not. Any time you plan to do a change to your system you should Run System Restore and create a restore point so you can do undo any changes you made if you have to. Better , yet, your system should be set to do so automatically! They are not a fix all. However, they are handy for many problems caused by a driver download, update, or any basic configuration changes.
~ CB